
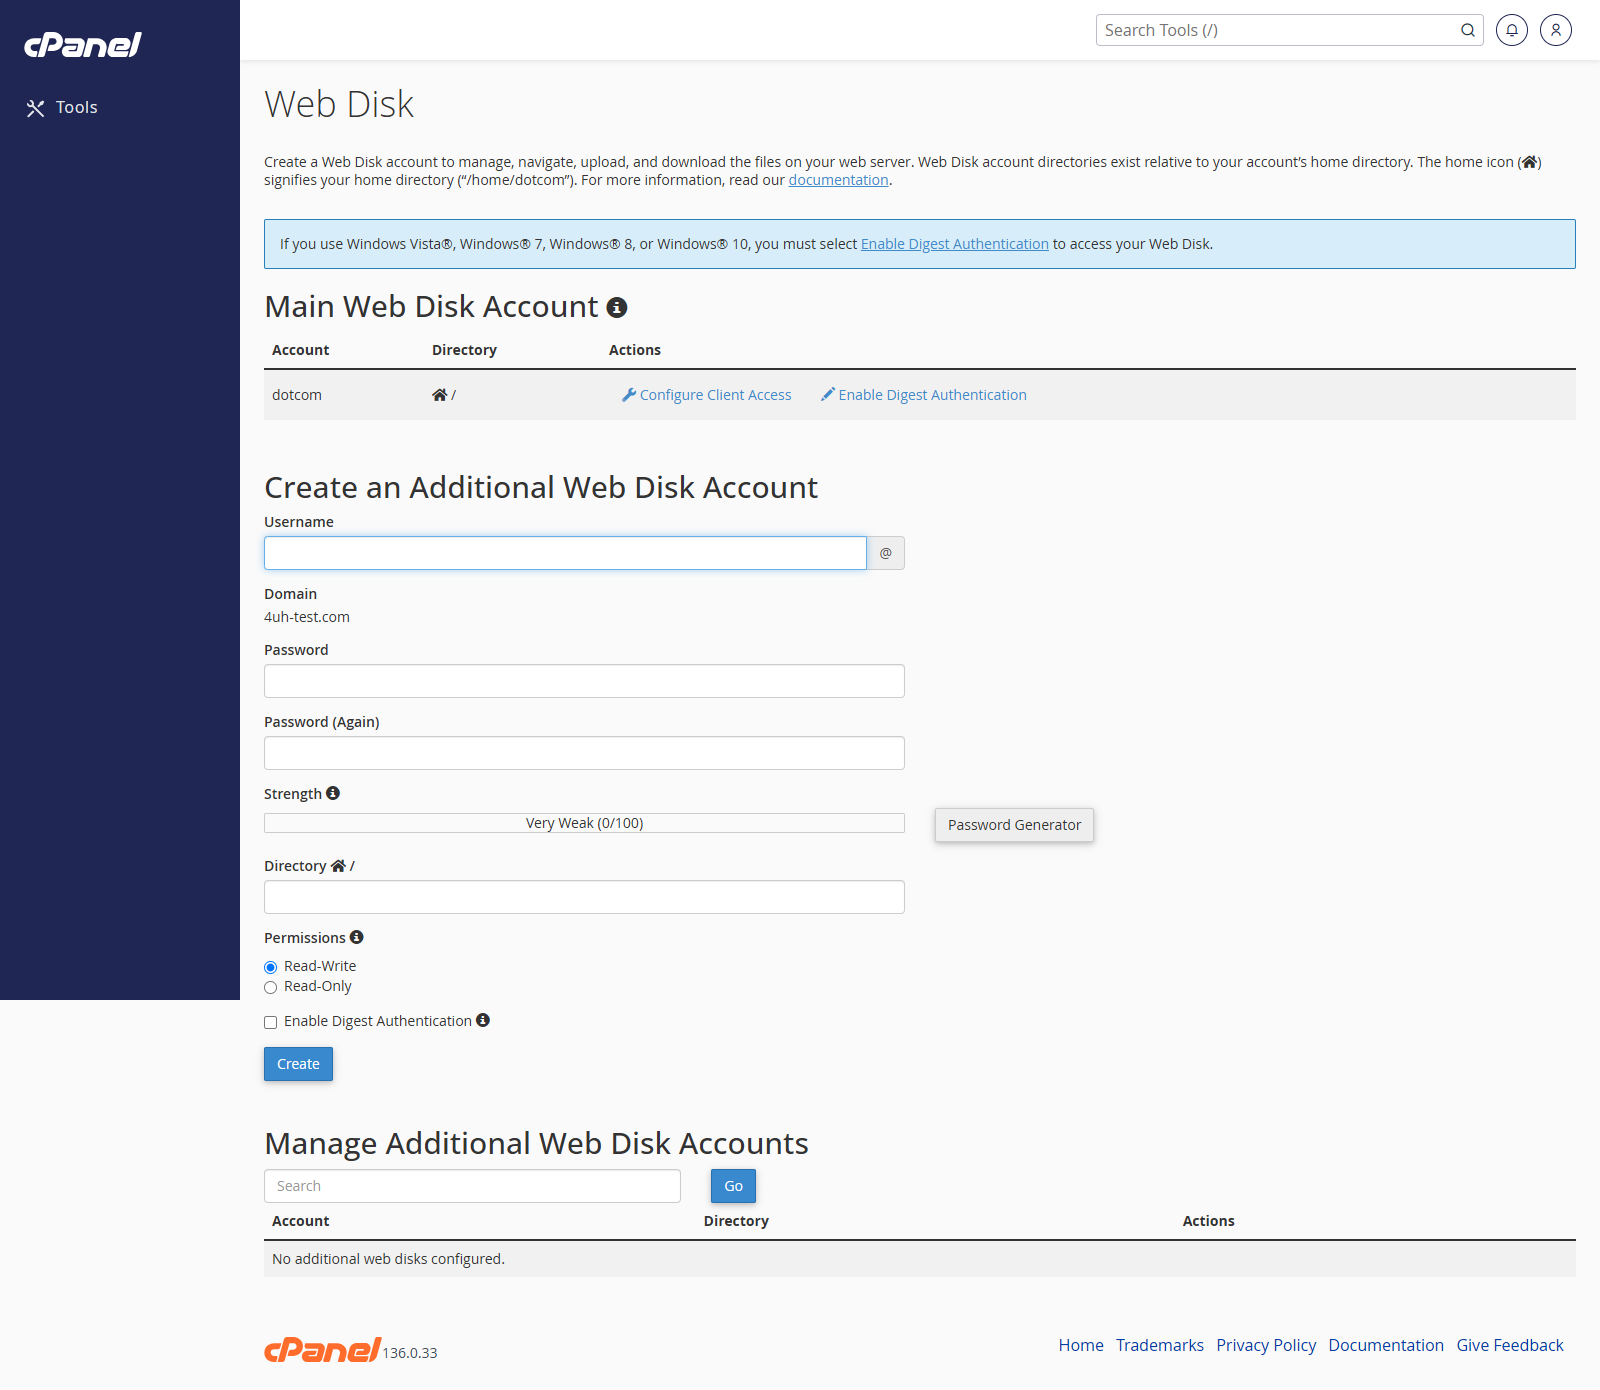
Create a Web Disk Account
- Go to Files > Web Disk.
- Enter a username.
- Choose the domain.
- Enter and confirm a password.
- Set the directory the user can access.
- Choose the permissions.
- Click Create.
Configure Web Disk on Your Device
- Go to Files > Web Disk.
- Find the Web Disk account.
- Click Configure Client Access.
- Choose your operating system.
- Follow the setup instructions shown by cPanel.
Change Web Disk Permissions
- Go to Files > Web Disk.
- Find the account.
- Click the permissions option.
- Choose Read-Write or Read-Only.
- Save the change.
Delete a Web Disk Account
- Go to Files > Web Disk.
- Find the account.
- Click Delete.
- Confirm the deletion.
Notes
- Web Disk lets you access server files from your computer using WebDAV.
- Limit each account to the directory it needs.
- Use a strong password for every Web Disk account.