
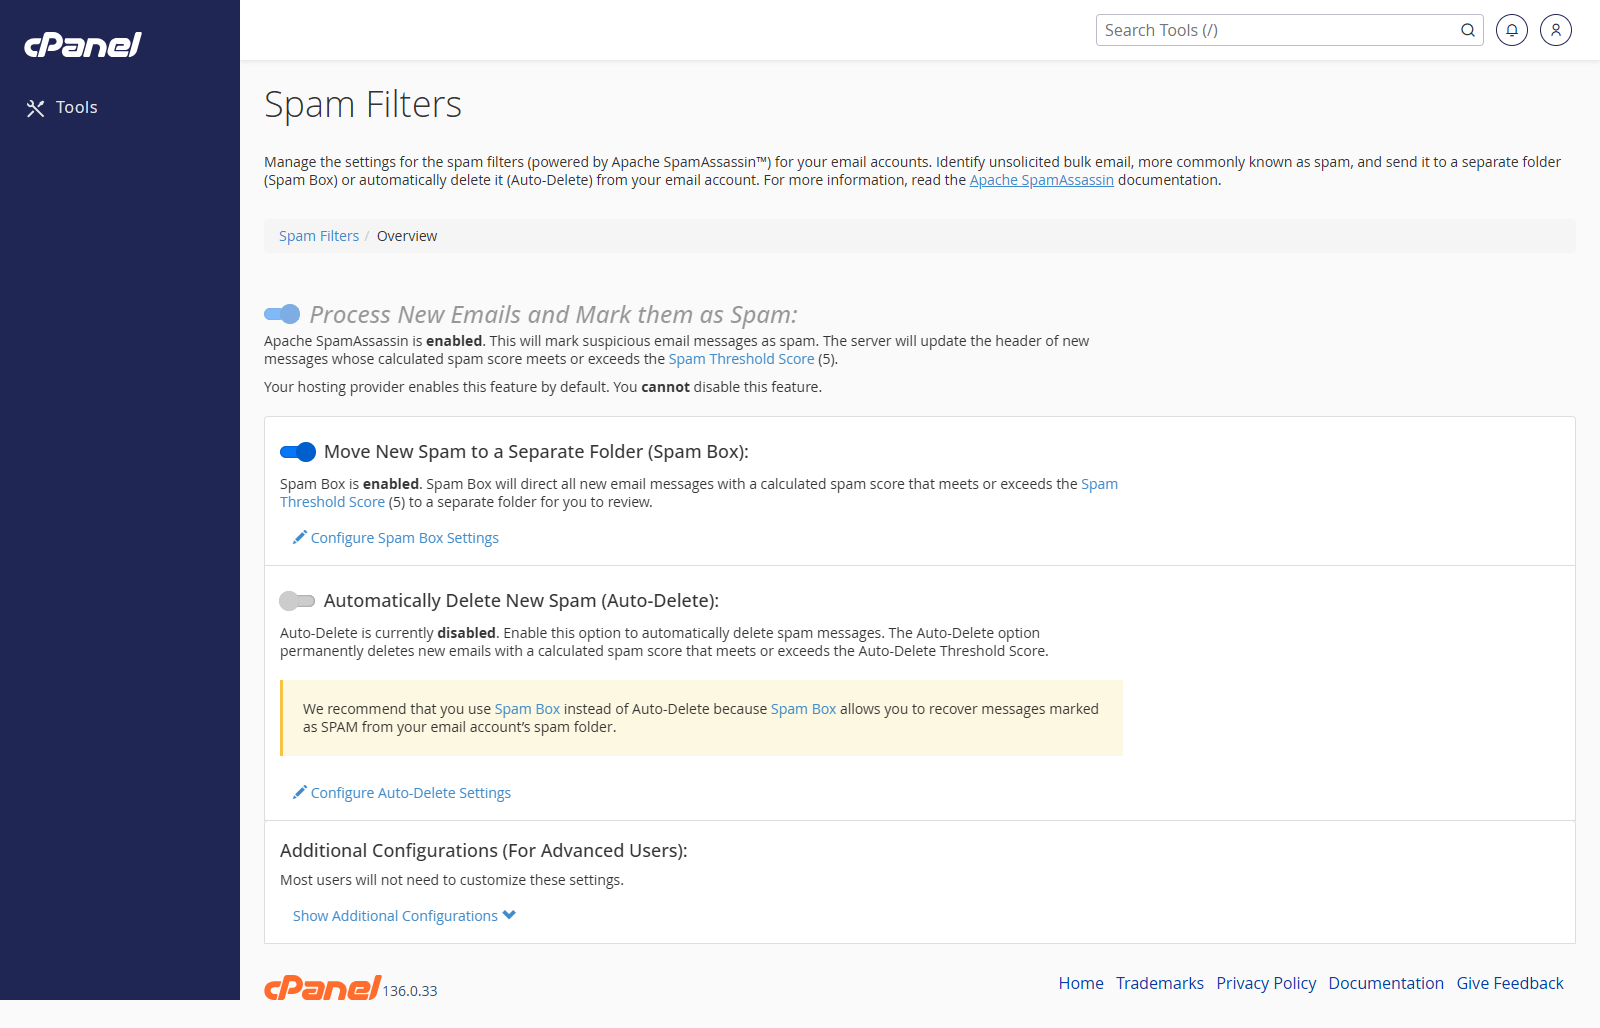
Turn Spam Filtering On
- Log in to cPanel.
- Go to Email > Spam Filters.
- Turn on Process New Emails and Mark them as Spam.
Change the Spam Threshold
- Go to Email > Spam Filters.
- Click Spam Threshold Score.
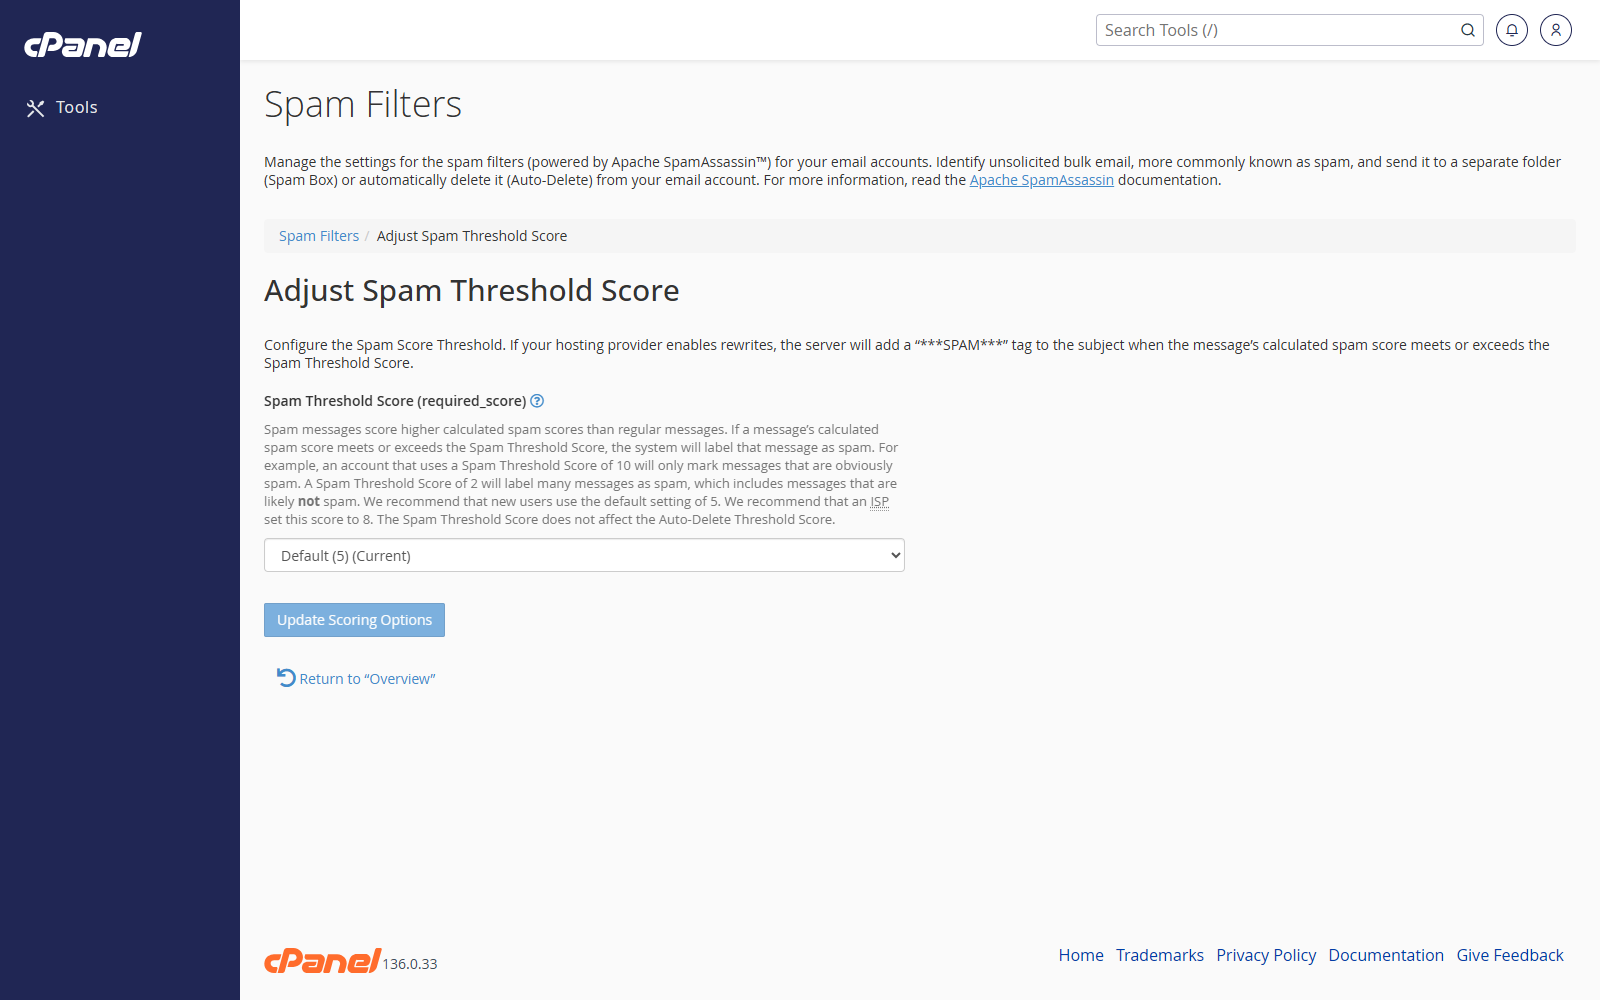
- Choose a score from the menu.
- Click Update Scoring Options.
Move Spam to a Spam Folder
- Go to Email > Spam Filters.
- Turn on Move New Spam to a Separate Folder.
- cPanel will place spam in a
spamfolder instead of leaving it in the inbox.
Empty the Spam Folder
- Go to Email > Spam Filters.
- Click Configure Spam Box Settings.
- Choose whether to empty one spam folder or all spam folders.
- Confirm the deletion.
Automatically Delete Spam
- Go to Email > Spam Filters.
- Turn on Automatically Delete New Spam.
- Click Configure Auto-Delete Settings.
- Choose the auto-delete threshold.
- Click Update Auto-Delete Score.
Add an Address to the Whitelist
- Go to Email > Spam Filters.
- Click Show Additional Configurations.
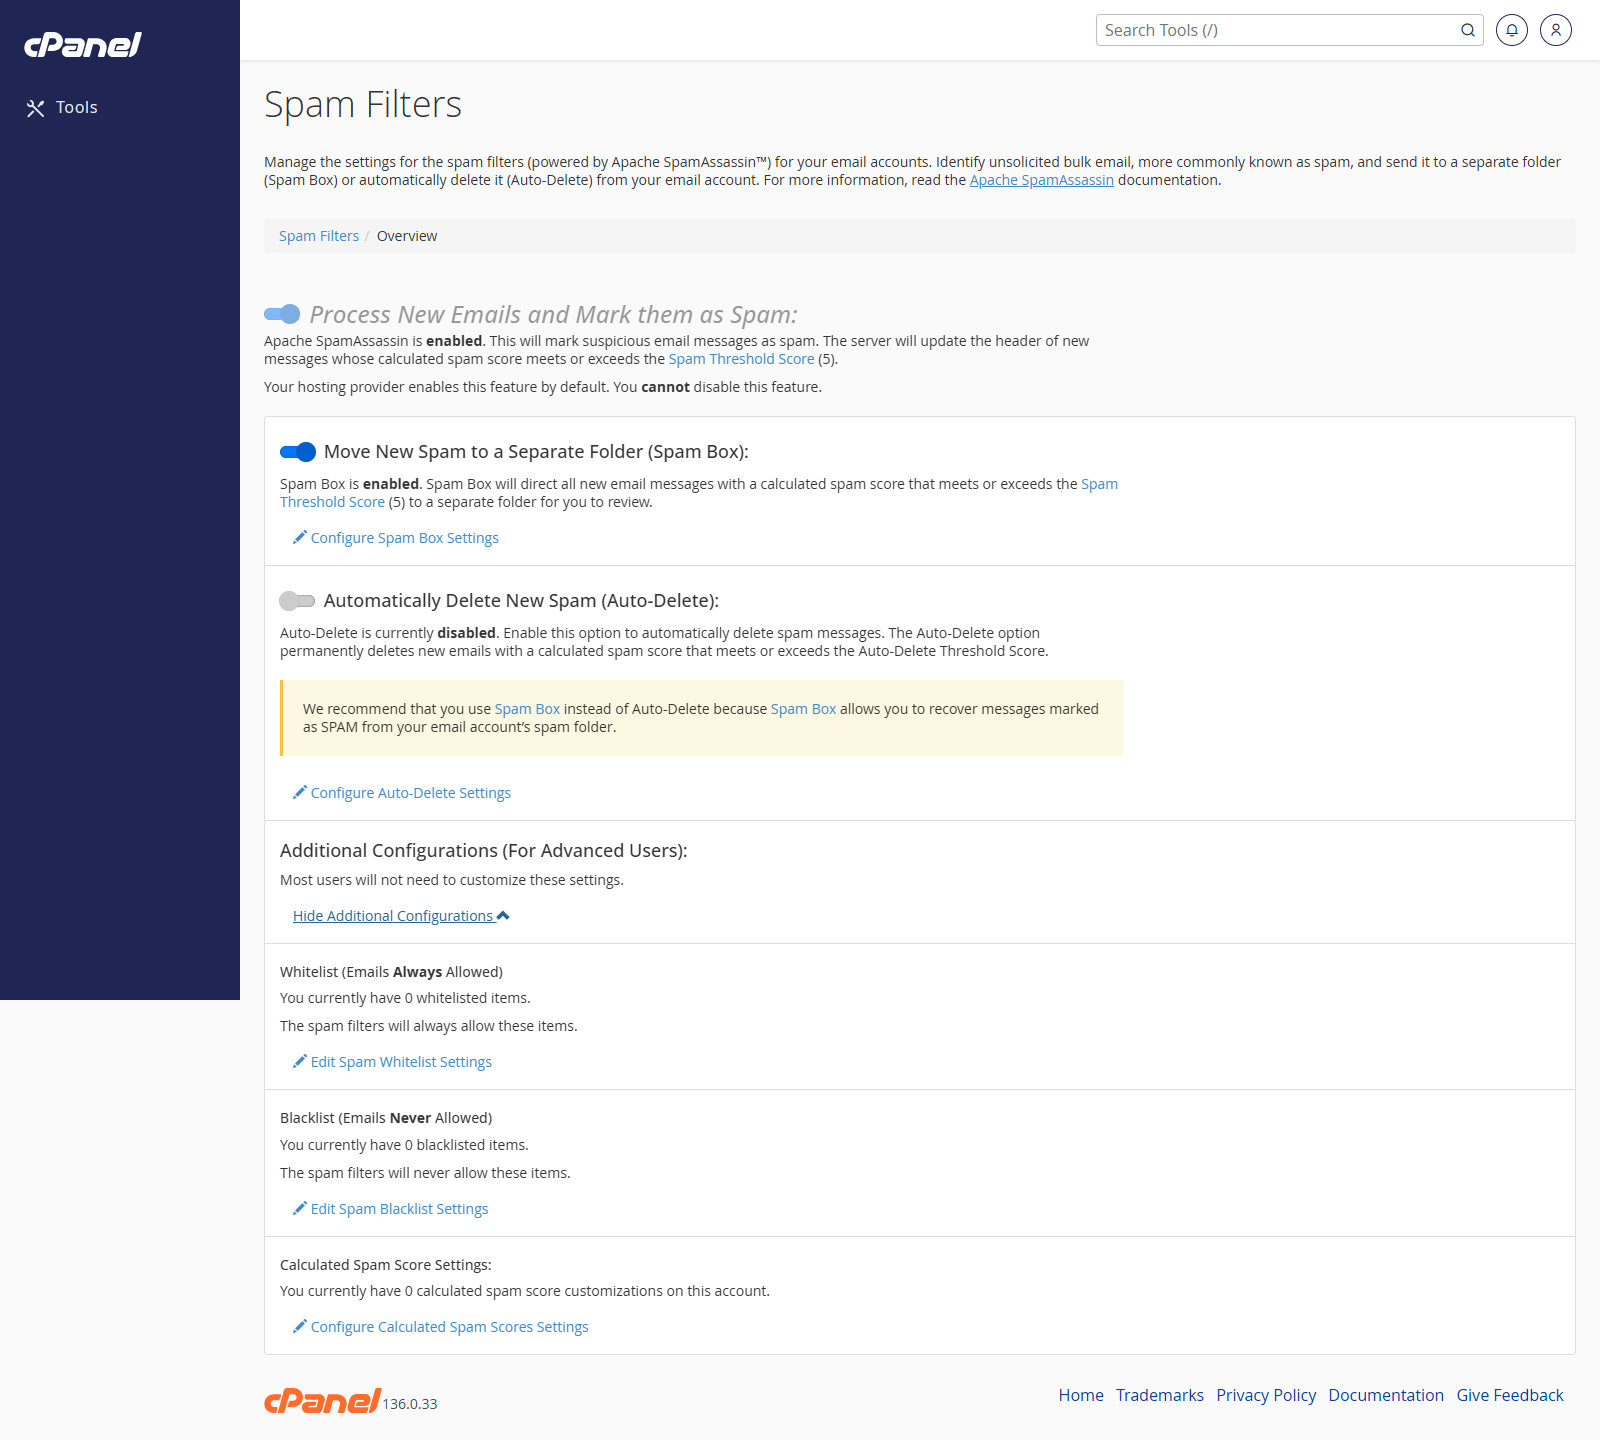
- Click Edit Spam Whitelist Settings.
- Click Add A New "whitelist_from" Item.
- Enter the email address.
- Click Update Whitelist.
Add an Address to the Blacklist
- Go to Email > Spam Filters.
- Click Show Additional Configurations.
- Click Edit Spam Blacklist Settings.
- Click Add A New "blacklist_from" Item.
- Enter the email address.
- Click Update Blacklist.
Notes
- Lower threshold scores catch more spam but may catch more genuine mail too.
- Auto-delete permanently removes matching messages, so use it carefully.